Easy, Creamy & Frightfully Fun 🎃
Some desserts are so simple yet so magical that they make everyone at the table smile — and this Spooky Halloween Fudge is one of them! With its smooth chocolate base, vibrant orange top layer, and melt-in-your-mouth texture, it’s the perfect blend of creamy comfort and spooky charm. Whether you’re hosting a Halloween party or just craving a cozy night treat, this fudge is guaranteed to steal the spotlight.
💕 Why You’ll Love This Fudge
This fudge isn’t just pretty — it’s foolproof. No candy thermometer, no tricky techniques, and no stress. Plus, the layered effect makes it look far more professional than it actually is. The bottom layer of semi-sweet chocolate gives a deep, rich base, while the orange-tinted white chocolate layer adds a playful seasonal pop. It’s sweet, silky, and slightly spooky — a true Halloween must-try.
📌 Pin It for Later
Save this recipe now so you don’t lose it when October rolls around!
👉 Pin it on Pinterest
🍫 Ingredients Needed
For the Bottom Layer
- 2 cups (340g) semi-sweet chocolate chips
- ½ can (7 oz / 200g) sweetened condensed milk
- 1 tsp vanilla extract
For the Top Layer
- 2 cups (340g) white chocolate chips
- ½ can (7 oz / 200g) sweetened condensed milk
- A few drops orange gel food coloring (avoid liquid food dye — it can break the chocolate)
Optional Toppings:
- Edible eyes, Halloween sprinkles, or mini candy pieces
👩🍳 Step-by-Step Instructions
- Prepare Your Pan:
Line an 8×8 inch (20×20 cm) square pan with parchment paper, leaving a little overhang to help lift the fudge later. - Make the Chocolate Layer:
In a heatproof bowl, combine semi-sweet chocolate chips and half the condensed milk. Microwave in 30-second bursts, stirring in between, until melted and smooth. Mix in vanilla extract. Pour into the pan and spread evenly. - Chill Slightly:
Place the pan in the fridge for 10–15 minutes while you prepare the top layer. - Make the Orange Layer:
Melt white chocolate chips with the remaining condensed milk using the same method. Once smooth, add orange gel food coloring and stir until evenly tinted. - Layer It Up:
Pour the orange layer gently over the chocolate base and smooth the top with a spatula. - Add Decorations:
Sprinkle edible eyes, gold dust, or Halloween confetti sprinkles while the fudge is still warm. - Chill Until Set:
Refrigerate for at least 2 hours, then slice into small squares using a sharp knife.
🎃 A Slice of Sweet Spookiness
What I love most about this recipe is the contrast. You get deep chocolate richness in one bite, followed by creamy vanilla sweetness in the next. The orange color makes it festive, while the smooth texture feels luxurious. It’s the kind of treat that brings both kids and adults running to the dessert table.
🍬 Perfect For
- Halloween parties and dessert buffets
- Edible gift boxes or goodie bags
- Family movie nights with spooky films
- Office Halloween potlucks
🎨 Decoration Ideas
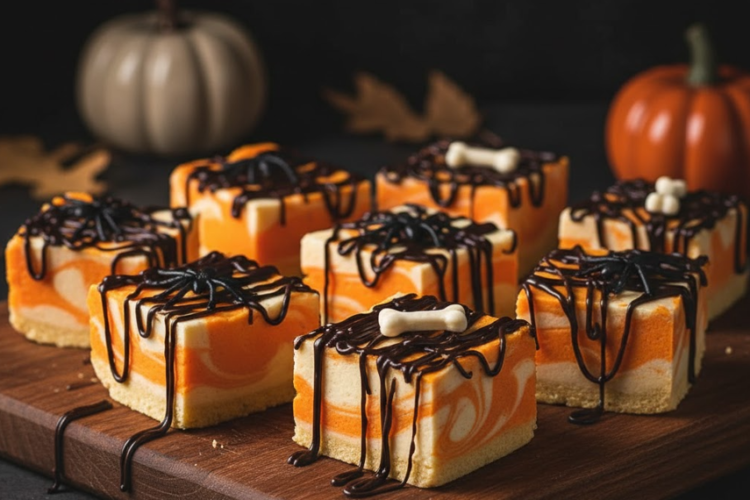
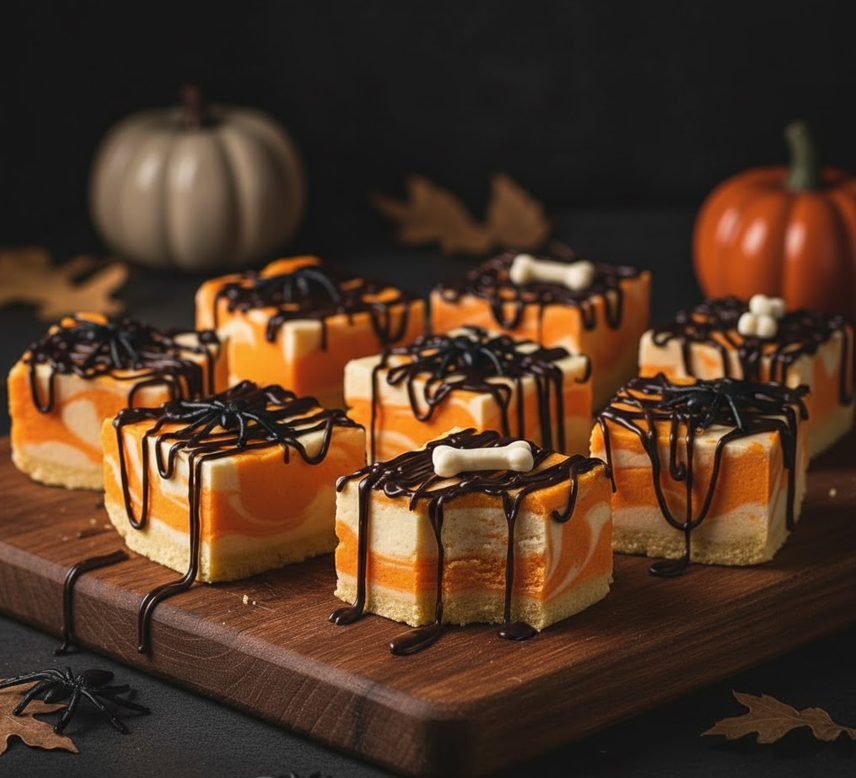
- Add a black drizzle made from melted dark chocolate for a “haunted” look.
- Swirl orange and white fudge together before setting for a marbled ghostly effect.
- Place a candy spider or mini bone on each square for that extra Halloween flair.
🤭 Fun Fact
Did you know fudge was actually created by accident in the 1800s? A candy maker “fudged” a caramel recipe, and voilà — the name stuck forever! Talk about a delicious mistake.
🍫 My Thoughts
When I first tried this fudge, I couldn’t believe how effortless it was. I didn’t even need to use a thermometer, yet it turned out perfectly creamy and smooth. The color contrast made it look like a bakery treat, and the best part? Everyone thought I’d spent hours on it. It’s my go-to when I want something impressive without the stress.
🍰 More Recipes You May Love
- Creepy Elegance Halloween Cupcakes 🎃
- Velvet Chocolate Lava Bites 🍫
- Toxic Swamp Matcha Cake 💚
- No-Bake Strawberry Mousse Cups 🍓
✨ My Little Story
When I made this fudge for the first time, it filled my kitchen with the cozy scent of melted chocolate and excitement. I remember thinking — Halloween doesn’t always have to be scary; it can also be warm, nostalgic, and delicious. That’s exactly what this recipe represents: sweetness with a spooky twist.
Written with love, chocolate, and Halloween magic — Mimi 🧡